Lesson · Owners and managers
Manage the menu and mark items sold out
Mark a dish sold out or back in stock in one tap, edit prices, sizes and add-ons, upload photos, and know what residents see when you do.
Owners, managers and kitchen staff About 4 minutesUpdated
Watch it first (0:57)
Recorded on the demo store with sample data; captions are on screen. Watch page with transcript. The same steps follow in text, with screenshots.
Who it's for
Owners and managers who keep the menu up to date. Kitchen and counter staff can use the one-tap sold-out switch too; adding and editing items is for owners and managers.
Before you start
- A staff sign-in at admin.bookmyfood.si. On the demo, staff sign in with their staff access code rather than an SMS code.
- For new dishes: a photo (JPG, PNG, WebP or AVIF, up to 5 MB) or a link to one, and the dish's price and preparation time.
Steps
Open Menu in the sidebar. Every item appears as a card with its photo, category, preparation time, price and, for owners, the margin. On a large screen the categories are listed on the left with their item counts. Use the search box (Search items or tags…) and the All / In stock / Sold out filter to find things quickly.
Mark something sold out. Tap the green In stock switch on the item's card. It turns red and reads Sold out. Tap it again when the dish is back.
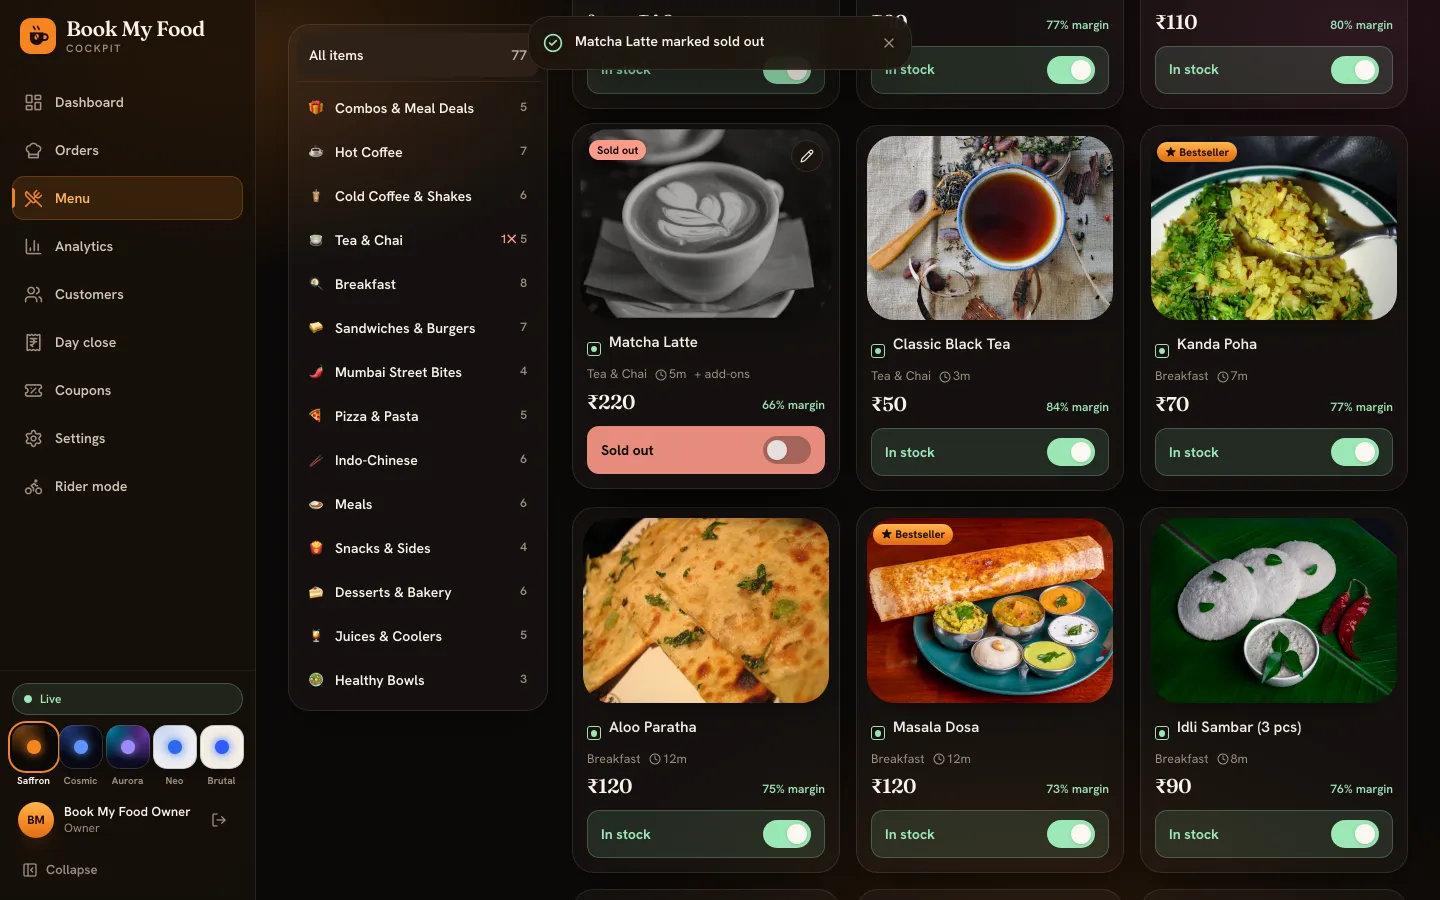
One tap: the item is sold out for every resident at once. Check what residents see. The change reaches open menus straight away, without anyone refreshing. The dish is greyed out with a Sold out label and can't be added. If someone already had it in their cart, their checkout asks them to remove it, and a reorder leaves it out and tells them so.
Edit an item. Tap the pencil on its photo. You can change the name, description, category, veg or non-veg, price, cost price (the editor shows the margin), preparation time, sort order and tags, and switch ★ Bestseller on or off. Tap Save changes.
Set up sizes and add-ons. Under Sizes / variants, add the sizes customers choose between (they pick exactly one, for example Regular and Large, each with its own price). Under Add-on groups, add groups such as Milk or Extras with a minimum and maximum number of choices and a price for each add-on (₹0 for options like “less sugar”).
Add a new dish. Tap Add item, upload a photo with Upload photo (or paste a link), fill in the details and tap Add item. Use Category to add a new section to the menu.
Remove a dish for good. Open it and tap Remove. It disappears from the menu; past orders and invoices keep it.
What you should see
A sold-out dish shows as Sold out on your menu screen and on every resident's menu within a moment, and the Sold out filter lists everything that is currently off.
Common mistakes
- Using Remove for “not today”. Remove takes the dish off the menu for good. For today, use the sold-out switch.
- Forgetting to switch it back. Sold-out items stay sold out until someone switches them back. Glance at the Sold out filter when you open in the morning.
- No cost price. Without it there is no margin on the card, and the menu engineering chart in Analytics needs cost prices for at least three items.
- Prices with or without GST. On the demo store, menu prices include GST (Settings → Operations → “Menu prices include GST”). Enter prices the way that setting says.
Related: the kitchen board for taking orders, and day close and reports to see which dishes sell. Moving from a paper menu? Read moving a society cafe off WhatsApp and the notebook.